
Time to Dress UP That Dog!
 |
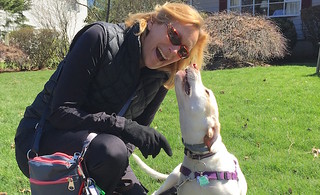
| The awesome wedding couple Nick and Asha and their incredibly loved dog Stella! Photo: courtesy www.stinabooth.com |
During a conversation around wedding plans I asked the bride and groom about whether Stella, their 14-month-old mutt would be joining them on their big day, because family is family no matter how many legs you have right?
This was a busy summer because there had been a big family
wedding in the works for months, if not at least a year of lengthy and detailed
planning.
The lovely wedding couple asked me to help out in various
ways and I was flattered to be able to contribute my talents to the
affair.
My biggest job was to dress the flower girls and to also
create a baby tutu for one of the flower girl’s sisters. I happily accepted the challenge and
soon after had mounds of beautiful tulle in various shades of pink all over my
dining room/sewing room. I am
embarrassed to say my poor family hasn’t had a meal at the table since I have
started sewing full time.
I promise to remedy that at some point but this blog isn’t
about the cute little flower girls or about my guilt over taking over the
dining room in our tiny house.
During one conversation around wedding plans I asked the
bride and groom about whether Stella, their 14-month-old mutt would be joining
them on their big day, because family is family no matter how many legs you
have right?
At first they didn’t think they would be able to manage her
as she is still technically a puppy and the wedding venue, although at a barn,
did not allow dogs on site.
Since we were staying at a nearby cabin in the Vermont woods my
family offered to care for her that week and bring her in only during the pictures
that the host had graciously allowed.
Wow! What a
chance to glam her up! Once I
heard we could work it all out I drove directly to the fabric store to buy
yards of delightful pink and white and navy blue ribbon all matching the brides
colors for her big day.
My plan was to make some kind of flowers out of ribbon,
decorate the middles of the flowers with some bling and somehow attach it all to
a nicely secure collar.
Technically I had never made such an elaborate collar and with Stella
now being incorporated into the wedding pictures it really had to be
fantastic.
With the pressure on I got to work…
Flowered Wedding Collar Tutorial
Gather Your Materials
First, this tutorial is really all about putting the collar together. This can be an easy activity where you buy an already made basic dog collar, as well as find, and buy some beautiful flowers or decorations at the craft store.
You could also make this a totally handmade activity where you make each of the items. How "diy" you want to get is totally up to you! It really depends on how custom the collar needs to match for the big occasion and whether you can find pre-made items to decorate with. Because I make dog collars and sell them here I had all that I needed to make my own. A nice tutorial on how to make a dog collar from a company where I purchase supplies can be found here.
I made all of the ribbon flowers for Stella's collar since I had already had some extra from the flower girl tutu's and this way they would match. There are so many different ways to make flowers and so many different looks I do not go into great detail here for how to make them. So, before you begin, if you plan to make your own and don't know how check out a few ribbon flower tutorials on YouTube first. Look how many there are!
Besides the collar and decorations, you should also have handy the following items to help you put the collar together:
- Sewing needles to accommodate heavy embroidery thread as well as thinner needles for sewing smaller items
- Heavy weight embroidery thread for anchoring flowers to the collar
- Lighter weight matching colored thread for sewing the smaller items
- Some "bling" like tiny pre-made flowers from the craft store or pretty buttons, maybe Swarovski crystals to push it over the top, etc.
- Glue Gun (not necessary but you may prefer it)
- Scissors
- Brush on Super Glue
 |
| Get your collar ready to put on lots of flowers and decorations! |
A little bit on how I made simple ribbon flowers
Once I completed the collar I needed a bunch of flowers in various sizes and colors. I made a couple of large sized flowers using two-inch wide satin blanket binding. I like blanket binding because of its shimmery look and how nicely it gathers, because of the thickness of the blanket binding I only use it for the largest flower. I begin by running a straight stitch along the right (or left) side about and 1/8 inch away from the edge the ribbon on the largest straight stitch and somewhat loose tension and starting and ending without back stitching. The idea is that you will pull the bottom thread and "gather" the ribbon so that it gets all frilly on the opposite side of the thread you are pulling.
Once I completed the collar I needed a bunch of flowers in various sizes and colors. I made a couple of large sized flowers using two-inch wide satin blanket binding. I like blanket binding because of its shimmery look and how nicely it gathers, because of the thickness of the blanket binding I only use it for the largest flower. I begin by running a straight stitch along the right (or left) side about and 1/8 inch away from the edge the ribbon on the largest straight stitch and somewhat loose tension and starting and ending without back stitching. The idea is that you will pull the bottom thread and "gather" the ribbon so that it gets all frilly on the opposite side of the thread you are pulling.
I cut a bunch of various widths of ribbon, 1 inch and 5/8ths inches in varying lengths, the longer the ribbon the bulkier the flower, and zipped them all through the sewing machine at once. When the machine sewing part is done I had a plate full of ribbons and I "gathered" each one. Some I gathered loose, some were done more tightly and then I could start hand sewing them at their bases to get them to look like flowers.
Once you get going you really only need one or two of the large flowers. Pick the best one as it acts as your anchor flower as well as the focal point of the collar when the whole thing is laid out.
 |
| In the beginning they just look like ruffled ribbons but soon they will look awesome! |
Once the flower shapes were done I could sew buttons into
the centers or use some shiny bling.
You could use Swarovski crystals if you like, I added pearl buttons to
match the back of the brides dress.
This is probably over kill on detail but I liked knowing that Stella’s
collar matched her “Mom's” dress even if not one other person knew!
 |
| By ruffling the ribbons, winding them around my finger and hand sewing them together the flowers start to take shape! The pink flower is my biggest flower and the focal point of the collar. |
Now the tricky part: Putting it all together!
Get excited, because all those little pretty flowers you just made (or bag of beautiful items you bought!) are going to become part of one of the most glamorous dog collars you have ever seen!
But, before you get too excited you need to plan the
application first.
- Have sewing needles, thread, heavy embroidery floss, maybe a glue gun, scissors and some brush on superglue ready.
- You will be building the flower display on the collar from the D-link (where you hook the dog up to the leash) side first because you need room for the collar to slide for adjustment and if there are flowers in the way that’s not good!
- Adjust the collar to the dog’s neck first if that dog is available so you know how far down to the adjustable slider you can go, if the dog isn't around just leave room down that end for the adjustable slider to move.
- Using the largest flower, begin by laying the decorations loosely out onto the collar how you would like them to look once sewn on. Have fun here, play with the placement by size or color do whatever looks good to you
- Medium sized flowers can go left and right and then go down in size just like a photo of people being lined up with tallest to smallest.
- I use the tiniest and/or skinniest flowers last and for filler since the collar will curve around the dogs neck gaps will open between the large and medium flowers, the small flowers will conveniently hide those gaps.
- You will probably make more flowers than you need, use the extras to decorate headpieces, shoes etc.
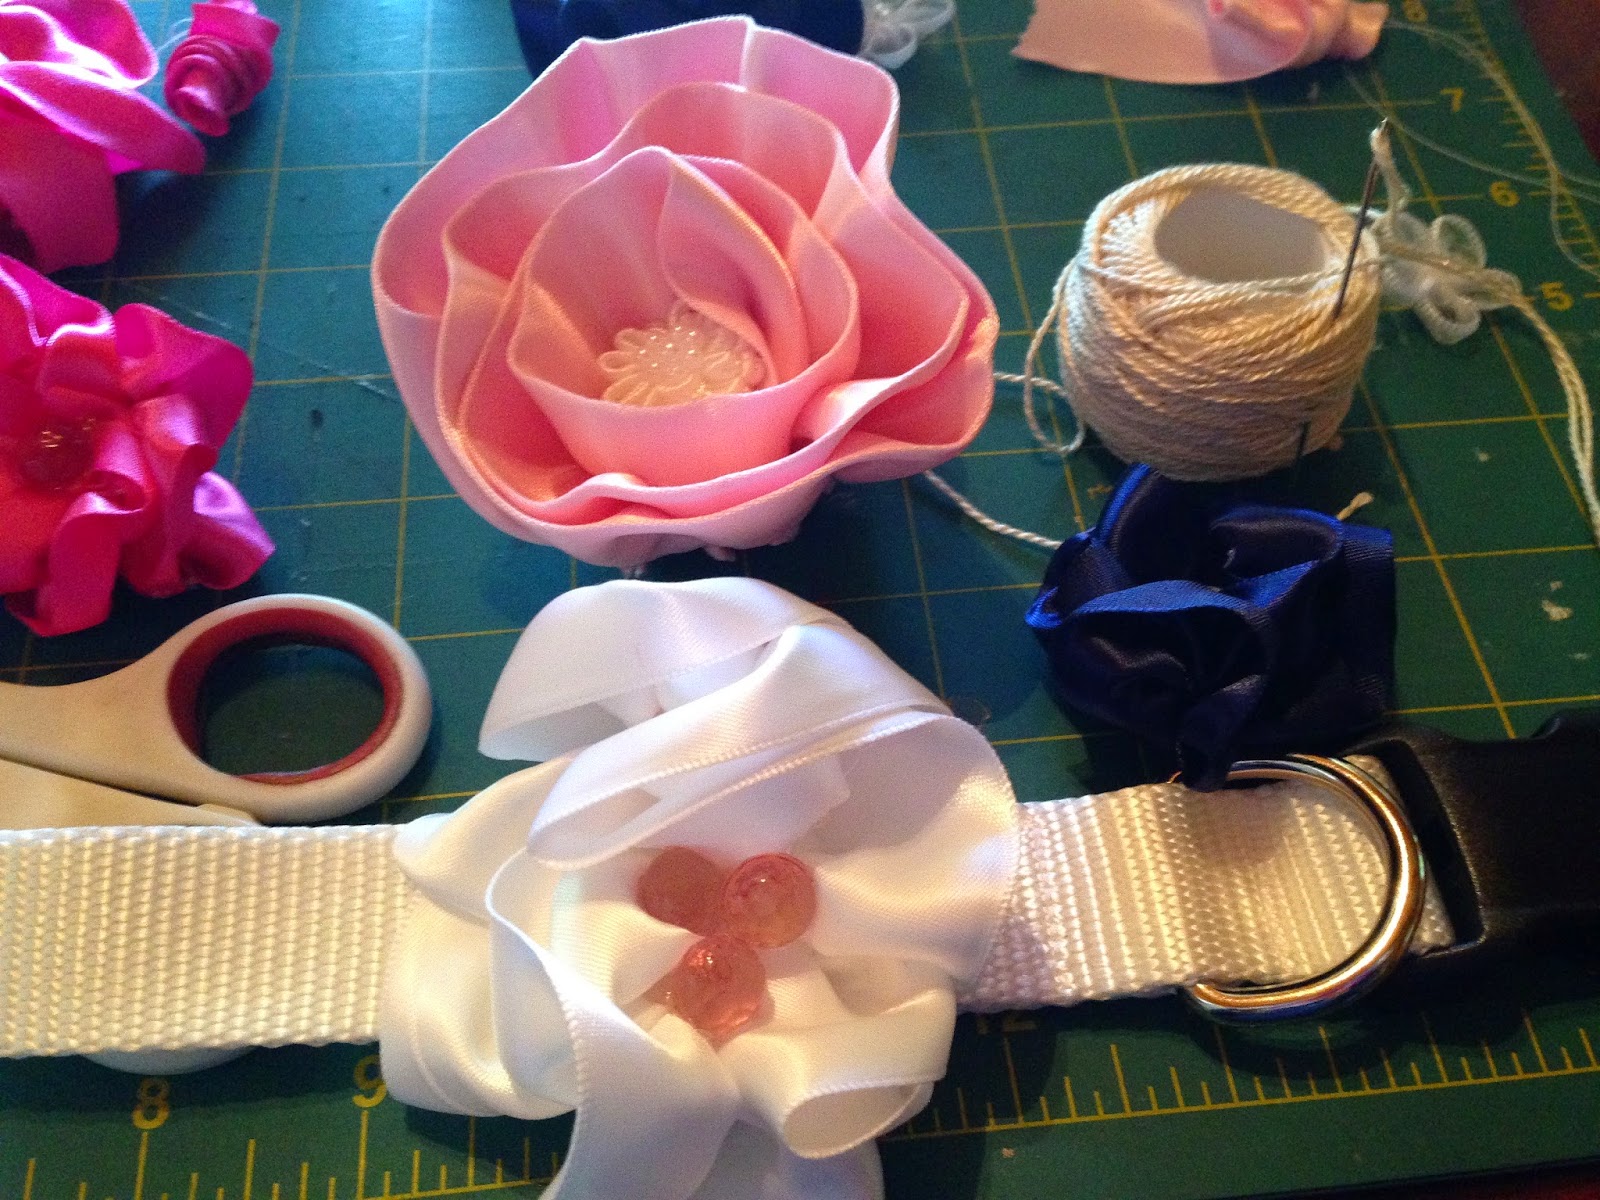 |
| Working right to left down the length of the collar I hand sew using heavy embroidery floss the large flower and the medium flowers on first. |
 |
| This is what the back looks like, I trim the threads and brush some super glue over the knots for added security. |
I started my collar by keeping the D-ring side of the collar on my right and loosely placing the largest flower somewhere on the right side near the D-ring to where there is only room on the right of the largest flower for one medium and then one smaller flower. Then, working on the left side of the biggest flower I continue building the look with flowers down the collar towards the slider being sure to leave room for the adjustable slider to move.
Once you have an idea of how you would like your flowers to
go onto the collar, carefully remove them keeping them in the same order so you remember how they should be sewn on. Begin sewing on the first and largest flower, I like to use heavy embroidery floss for this part.
Continue hand sewing and anchoring your bigger and medium flowers to the collar.
Once I had a nice line of flowers sewn on, I began adding
smaller ones and tucking some bling in spots for filler. I work by curving the collar as if it
were fitted to the dog’s neck so I can see how the flowers sit on the collar
and where I should tuck in the tinier ones or sew some petals together. The tinier flowers can be
attached by sewing to the adjoining flowers’ petals and I continue like this in
detail until I feel it is complete. Once done, I brush some superglue on the knots that are holding the large and medium sized flowers onto the collar for added security.
When I finished here is what Stella's Wedding Day Collar looked like:
 |
| Front view of completed collar, take note of how the smaller flowers are tucked into spots, experiment and have fun! |
 |
| The lovely Stella all dressed up for the big day! She was a very good girl. Photo: Courtesy www.stinabooth.com |
 |
| Here is another I completed recently for my Etsy shop |
So, experiment and have fun, don't be afraid to jump in and make your own
one-of-a-kind dog collar so your furry pal can be a part of yours or a friend’s
special day!
1 comments
Thank you Simon! I agree one hundred percent on your comment!
ReplyDelete